


There are 2 important things you must have if you do not want to order pizza takeout but still want to enjoy eating smoky and crispy pizza with flavorful toppings at home, one is a perfect outdoor pizza oven, the other is the skill for making a perfect pizza dough! I can’t get you an outdoor pizza oven though, I can share you with some tips about how to make a pizza dough, which determines the the texture of your pizza crust, based on my experience.
How I found difference of making pizza dough between tabletop pizza oven And outdoor pizza oven.
More than a decade ago, I produced a recipe for New York-style pizza dough, which was a tremendous hit and served as the basis for dozens of other pizza and flatbread recipes. While most of my pizza recipes are designed for use in home ovens with a maximum temperature of 550°F, I've baked them in scorching hot wood-fired ovens and they've turned out well. That made sense to me because, in general, the hotter and faster you cook a flatbread, the better it comes out, because the interior stays moist and supple while the exterior browns and chars nicely.
That's why I was perplexed when I started baking pies in a tabletop outdoor gas oven—which readily hits wood-fired-oven temperatures of 800-900°F—and the toppings and undersides were burning before the pies were fully baked. Don't get me wrong: I'm not saying they burned. Charring, as the constellation of irregular dark-brown dots on the rim of a well-made pie is generally known—is a positive thing, giving the crust a pleasant Maillard and caramelization flavor. What I'm talking about is something akin to incineration, where vast swaths of the rim would be solidly black and unpleasantly bitter, frequently as a result of the rim catching fire as the pie baked.
At first, I felt it was a case of human error on my part or a defect in the way my oven operated. But then I remembered all the other folks on my Instagram feed who were baking delicious, non-burned pies in identical tabletop ovens. Which made me question why my doughs baked nicely in larger wood-fired ovens but burned in smaller tabletop ovens, despite the fact that they were both heated to the same temperature?
It didn't take long for us to figure out that the only variation was in size. The fire is nestled in one corner of a large, towering chamber in a wood-fired oven, providing plenty of room for the pies to cook safely away from it. The pizza rests inches from the fire in a tabletop oven, which means it's exposed to a lot of intense heat with nowhere to go to escape it.
I decided to ask some of those tabletop pizza oven gurus for help in order to figure out what I was doing wrong. If they were able to pull it off, I needed to know why. They warned me that if I didn't add anything to the dough other than the four basic ingredients of any bread—flour, water, salt, and yeast—the pies would burn.
Then it hit me: I'd gone wrong with the New York-style pizza dough recipe I mentioned before, the one that had spawned a slew of others. That's because it includes a few extra components in addition to flour, water, salt, and yeast: sugar, oil, and diastatic malt powder in later incarnations and several spin-off recipes.
All three of these ingredients are necessary in a pizza dough that is intended to be baked at a lower temperature in a home oven, where pizza takes a long time to brown—about 8 to 12 minutes. There are 3 reasons as shown below:
- Sugar increases browning because sugars—added or naturally found in the flour of the dough—caramelize in the oven's heat.
- Diastatic malt is an enzyme that converts flour starches to sugar, and it's commonly used in doughs to ensure that there's always enough sugar in the crust for optimum browning.
- Oil helps keep the finished pizza soft by lubricating the gluten network and keeping it pliable even after a long bake.
However, when the pies cook in just 2 minutes, the combination of all three of these things is bad news: Sugar and diastatic malt both give too much "food" for caramelization, while oil enhances heat transmission from the oven to the pie, speeding up browning all over again, in addition to its influence on tenderization.
To corroborate my suspicions, I conducted a series of tests. I prepared doughs with and without each of these items, and the pies with the "additional" features were more likely to burn before the toppings and/or underside were fully cooked in every case. (I also timed how long each pie took to cross the line between charred and burned, and the only one that took longer than 2 minutes was the one without the toppings.)
The rest was simple once I got rid of these changes to my formula, especially given there were only four ingredients to consider and the rest of my pizza dough chops were solid:
Flour: Instead of bread flours, which are closer to 13 percent protein, I went with a medium-high protein flour like King Arthur all-purpose, which has about 12 percent protein. The amount of gluten that forms in a dough, and consequently the texture of the finished pizza, is determined by the protein percentage. That's because high-protein bread flour produces a pizza that's a little rough without oil to tenderize the dough. Slightly lowering the protein content helps to restore the softness that had been lost. (However, if you don't have access to King Arthur all-purpose flour, bread flour will suffice.)
Water: Because water, like oil, lubricates gluten, the amount of water in a dough has a significant impact on the final texture of the pie. So, if you want a delicate, not-too-tough dough, add extra water. However, too much water can make a dough sticky and difficult to work with, so there's a limit, especially if you're attempting to produce a formula that's simple enough for both novices and specialists. I ended up with a dough that was 67 percent hydrated (67 grams of water for 100 grams of flour), which was a decent compromise between ease of handling and maximum tenderness. One note: I prefer 70% hydration myself, however the dough can be a little difficult to work with. If you want, you can find instructions in the notes section below.
Yeast: Almost all of my pizza doughs are cold-fermented, which means they've been in the fridge for at least a few days before being used (more on why below). To avoid excessive fermentation, I use a very small amount of yeast—0.4 percent, or about 1/2 teaspoon for three to four pizzas.
Salt: Most breads, including pizza, have between 1.5 and 2.5 percent salt; I prefer a high amount of salt in my pizza doughs—2.2 percent in this case—because it ensures the crust has the powerful flavor it requires to stand up to (often) intensely flavored toppings.
The mechanics of dough mixing, kneading, and the initial fermentation are all quite simple. The dough is swiftly mixed in a food processor, sans the salt, and then set aside for 20 minutes to rest. This process, known as an autolyse, aids in the passive development of gluten so that the dough does not overheat while being kneaded by the machine. Then you add the salt and knead the dough in the machine for about 30 seconds, or until it's well-developed.
After that, you divide the dough, form it into balls, and place the balls in the fridge after allowing it to prove at room temperature until it's puffy, which takes about an hour or two.
For a few major reasons, cold fermentation is a crucial dough-making technique:
Flavor: Cold fermentation adds a level of taste depth to the dough that a rapid fermentation can't, because to the aromatic components that only form when a dough proofs at low temperatures. (At higher temperatures, the chemicals are completely transformed to carbon dioxide, which gives bread its lift.)
Easy Stretching: Because the dough has had time to relax, it's much easier to stretch it out into a lovely round disk without it resisting. This not only improves the appearance of your pies, but it also keeps them tender, as overworked dough produces a tough, chewy pizza.
Convenience: While this process does necessitate advance planning, you may cook pizza at any time within a 3-day window after removing the doughs from the fridge, which takes only an hour or two.
The recipe yields four 225-gram dough balls, which are suited to create 10-inch pies in a smaller (12-inch) oven, or three 300-gram dough balls, which are sized to make 12-inch pies in a larger (16-inch) oven.
Instead of side-by-side on a rimmed baking sheet, I strongly advise cold-proofing the dough in individual containers, such as the 7-inch plastic takeout container depicted above. This not only prevents the dough balls from kissing one another, making it difficult to separate them without ripping them, but it also allows you to handle each ball as gently as possible, avoiding overworking the dough before shaping it. You can use this dough to make any kind of topped pizza you'd like.
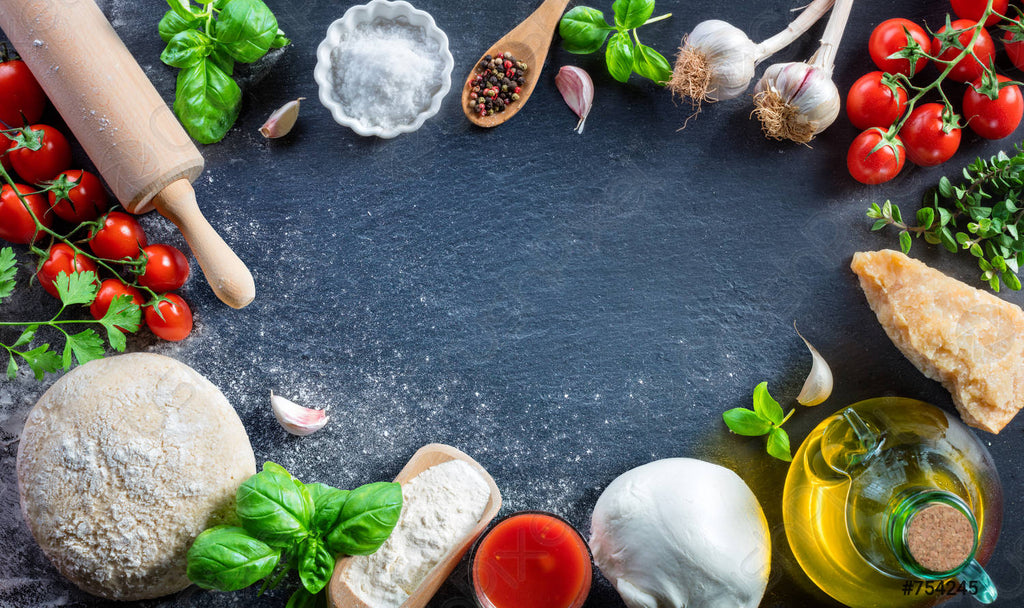
Pizza dough ingredients:
535 grams (18.9 ounces; about 4 cups plus 3 tablespoons) All-purpose flour with a high protein content, such as King Arthur (Baker's percentage: 100%)
Instant dry yeast, such as SAF (Baker's percentage: 0.4%), 2g (0.07 ounce; 1/2 teaspoon)
360g (12.7 ounces; about 1 1/2 cups plus 1 tablespoon) water at 40°F (4°C), (Baker's percentage: 67%)
Diamond Crystal kosher salt, 12g (0.4 oz; 1 tablespoon) (Baker's percentage: 2%)
Extra-virgin olive oil is used to coat proving jars and dough balls.
Directions to follow:
1. In the bowl of a food processor, combine flour and yeast. Pulse 3–4 times until everything is fully blended. Add water while the machine is running and process until the mixture forms a rough ball and no dry flour remains, about 10 to 20 seconds. Allow for a 20-minute recovery period.
2. Add salt to the top of the mixture and process for 20 to 30 seconds, or until a relatively smooth ball of dough emerges. When the dough is completely mixed, an instant-read thermometer should read 75°F (24°C). If not, continue mixing for 10 seconds at a time until the dough reaches the appropriate temperature. Using your hands, knead the dough ball once or twice in a lightly oiled medium basin.
3. Knead dough in bowl with lightly moistened hands for 5 to 10 seconds, or until texture is uniform. Cover and set aside at room temperature for 60 to 120 minutes, or until puffy and nearly doubled in volume.
4. Divide dough into four pieces of about 225g (8 ounces) each for 12-inch ovens, or three pieces of about 300g (10.5 ounces) each for 16-inch ovens, on a lightly floured countertop. Make a nice, spherical ball out of each part. Place each dough ball in a 4- to 7-inch round, lidded plastic takeaway container, or on a lightly-oiled tray, spaced at least 2 inches apart and covered loosely but fully. Refrigerate dough for at least 24 hours or up to four days before using (48 to 72 hours is ideal).
5. Remove dough balls from refrigerator the day before you plan to bake pizzas and set them to warm up for 1 to 2 hours, covered. The exact timing varies on the ambient temperature; before stretching and baking, the dough should be at least 60°F (15.5°C).


